Ceilings endure a lot of environmental stress, resulting in cracks, stains, and plaster damage. Recognizing and addressing these problems promptly can help prevent expensive repairs down the road.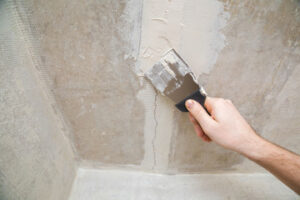
Before starting any work, make sure the ceiling area is thoroughly dry. Set up adequate lighting and secure your ladder. Cover the floor beneath your working zone with a tarp or plastic sheet to catch any falling debris. Contact Ceiling Repair Perth for professional help.
Performing regular inspections of the ceiling helps maintain a home’s value and ward off structural damage. When spotted early, issues like water damage, cracks and crumbling plaster, or mold and mildew growth can be addressed before they escalate into costly repairs.
Water damage to the ceiling can be caused by many different underlying problems, including leaky roofs or burst pipes. Regardless of the source, water intrusion can cause unsightly discoloration, sagging ceilings, and mold or mildew growth. Addressing the underlying problem is essential to preventing further damage and eliminating health risks for the occupants of the home.
Cracks in the ceiling can be a sign of several issues, including structural settling or extreme temperature changes. Hairline cracks are usually cosmetic and can be repaired using joint compound or drywall mud. Larger cracks, however, may indicate a more serious issue and require professional repair services.
Once the ceiling is dry, a professional technician will inspect the damaged area and determine the root cause of the problem. Then, they will create a plan to effectively repair the issue and restore the ceiling’s appearance. This process often involves removing and replacing the damaged sections of the ceiling, so it is important to have proper access to the attic or crawl space.
Depending on the severity of the cracks, a professional may use a hammer and chisel to break up the underlying surface before applying joint tape and drywall mud. They will then smooth the joint compound over the affected areas, using a taping knife to get a smooth and even finish. They will also apply a waterproofing sealant to prevent moisture from seeping through the ceiling into the interior of the house.
Leaks on the ceiling can wreak havoc on both the drywall and wood materials that support it. This can lead to sagging, rot, and structural instability. In addition, persistent water leaks can create a damp environment that promotes mold and mildew growth, which poses health concerns for the occupants of the home. Addressing water stains on the ceiling quickly and thoroughly can prevent deterioration of the materials and help protect the safety of the occupants.
Cut Out the Damaged Area
Water damage to a ceiling is not only unsightly, but it can lead to further problems throughout your home. If left untreated, mold and mildew can grow, wood can rot, and paint can peel.
Taking the time to repair your ceiling as soon as you notice water damage can help prevent further complications, and it will also save you money in repairs and replacement costs.
In the event of a severe flood or extensive water damage, it may be necessary to replace the entire ceiling. However, if you can identify and address the source of the water, you can often repair it with a few simple steps.
Locate and shut off the water source. Pull down sagging or wet drywall materials, and remove any insulation or other items that are saturated with water. Dry the affected area with a dehumidifier or fans to prevent the growth of mold and mildew.
If you are unable to access the affected area from above, using a drywall saw you can cut out the damaged area and patch it. Be sure to measure the length and width of the hole, and then cut a new piece of drywall to match those dimensions. Depending on the extent of the damage, you may need to install additional drywall panels.
Once you have patched the hole and sanded down any rough edges, you can apply a thin layer of joint compound over the tape to secure the drywall. Allow this to dry, and then sand the area smooth. If needed, apply a second coat of compound and sand again, if the surface is uneven or the drywall seems too heavy after the first application.
If you have a textured ceiling, match the texture of the surrounding areas by applying a spray or roller with a matching texturing compound. Be sure to test the compound on a scrap of the ceiling to ensure it adheres well and matches the texture. Once you have completed the repairs, prime and paint to match the existing ceiling color. You should also inspect the repaired area for signs of leaks or other water damage sources, and fix any that you find.
Apply a Stain-Blocking Primer
Stain-blocking primers prevent water stains, tannins and other substances from bleeding through your paint job. They also seal bare wood and prevent moisture from damaging the surface. If you are repainting a ceiling that was previously stained with water or other substances, it is important to use a stain-blocking primer to get the best results. The type of primer you use depends on the material. Stain blocking primers are especially vital for drywall. Because drywall is so porous, without a primer the new paint will just sit on top of the old color, instead of adhering to it.
Stains like tannins, pressure treatment chemicals and rust from nail heads can bleed through some paints, creating an unsightly appearance. These stains need to be blocked with an oil-based stain blocker. You can find these in most hardware and home improvement stores. Some of these are available in a spray can, making them convenient to apply to small areas of the ceiling. Some of them are odorless, which is useful for people with allergies or sensitivities.
The best stain-blocking primers are usually white, which makes them easy to use with any color of paint. If your previous ceiling was a darker shade, you can tint the stain-blocking primer with a bit of painters white to help it cover the color. Before you apply the primer, clean the ceiling and remove any loose or chipping paint. You should also use a damp cloth to wipe away any dirt, dust or soap film that might be present. If there is mold or mildew, use Jomax Mold & Mildew Stain Remover to clean it. You should also countersink all nail heads and sand the surface smooth.
After the stain-blocking primer dries, you can apply your ceiling paint. You can use a gloss or satin paint for a fresher look, but if you need to match your existing stain pattern use a matte finish. The flat sheen hides minor surface imperfections and can be tinted to light colors.
If you do not want to use an oil-based primer, you can try a water-based one such as Aqua Lock Plus. This is not as powerful as Prime Block, but it will do the trick in most cases. Another option is to go nuclear and use BIN, a shellac-based primer that is very powerful and dries quickly.
Paint the Ceiling
A fresh coat of paint brightens the room and can hide imperfections in drywall or sagging areas. However, if you have water damage in the ceiling or other issues with this surface, proper preparation and painting technique are essential to the success of the project. By addressing the problem in the right order and following professional painting techniques, you can ensure that your ceiling is free of imperfections.
Begin by examining the damaged area closely. If you see small cracks or nail pops, fill them with joint compound and sand smooth once it dries. If there are significant dents, you’ll need to replace the damaged section of the ceiling. Score around the damaged area using a utility knife, making a shallow cut that doesn’t affect the paper face of the undamaged drywall. Carefully cut away the damaged drywall section, being careful not to pierce through the underlayment or cause additional damage.
Once the repaired area has dried, apply a stain-blocking primer to prevent future stains. These primers seal wood tannins and other staining agents that can bleed through standard paint.
If you’re planning to repaint the entire ceiling, choose a color that matches the existing paint so that the patched area blends in with the rest of the room. When painting the ceiling, apply multiple thin coats rather than one thick layer. This will minimize drips and roller marks. When the first coat dries, examine the ceiling under different lighting conditions to catch any missed spots or uneven areas that need touch-ups.
Often, damp stains appear as yellow or brown streaks in the ceiling. These are caused by wood tannins, which bleed through water-based paint. To stop them from coming back, you must use a stain-blocking primer on the ceiling. These primers are specially designed to prevent stains, mold, and smoke marks from bleeding through the topcoat of paint. The best stain-blocking primers are oil-based and come in a variety of finishes, including white. When you’re ready to start the actual painting, be sure to use a long extension pole and carefully mask any walls you don’t want to get paint on.