Concrete Greensboro NC has long been a cornerstone of modern construction. Its strength and durability make it essential for infrastructure. From skyscrapers to sidewalks, concrete supports countless structures. Its adaptability allows it to be shaped and molded for various applications.
Concrete is a composite material made from cement, water, and aggregates. The mixture creates a chemical reaction that hardens over time. The quality of concrete depends on the ratio of its components. Proper mixing ensures consistent strength and performance.
Concrete’s versatility extends beyond structural use. It is used for decorative purposes in homes and public spaces. Stamped and stained concrete creates unique patterns and finishes. Its ability to be customized makes it suitable for various design styles.
The strength of concrete comes from its curing process. Hydration occurs when water reacts with cement, forming crystals that bind the mixture. Proper curing requires controlled moisture and temperature levels. A well-cured slab resists cracking and surface damage.
Concrete’s compressive strength allows it to withstand heavy loads. Reinforcement with steel bars increases tensile strength. This combination provides stability for large buildings and bridges. Reinforced concrete resists bending and shifting under stress.
Concrete foundations provide a stable base for buildings and structures. Soil conditions and load requirements determine foundation design. Contractors use footings and piers to distribute weight evenly. Proper foundation work prevents settling and structural failure.
Concrete slabs serve as the base for floors, driveways, and patios. They require proper leveling and finishing to avoid uneven surfaces. Expansion joints prevent cracking due to temperature changes. Sealing enhances durability and protects against moisture penetration.
Decorative concrete enhances the visual appeal of outdoor and indoor spaces. Stamped concrete mimics the appearance of stone, brick, and wood. Colored concrete adds variety to driveways and walkways. Polished concrete creates a sleek, modern look.
Concrete walls provide structural support and design flexibility. Load-bearing walls handle vertical and lateral pressure. Non-load-bearing walls serve as partitions and design elements. Textured finishes add visual interest and surface protection.
Concrete countertops have gained popularity for their durability and custom designs. Contractors create molds to achieve specific shapes and textures. Sealants protect the surface from stains and moisture. Proper curing enhances strength and minimizes imperfections.
Concrete stairs and steps require careful measurement and finishing. Improper installation leads to uneven surfaces and safety hazards. Reinforcement prevents cracking under heavy use. Sealing adds traction and protects against weathering.
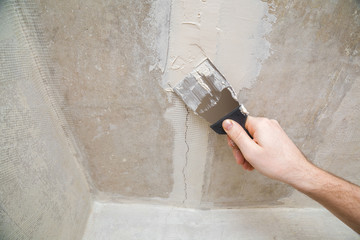
Concrete repair and restoration involve assessing surface damage and structural integrity. Cracks, spalling, and discoloration are common issues. Contractors use patching compounds and resurfacing techniques. Sealing prevents future damage and improves appearance.
Concrete cutting and coring require specialized equipment and precision. Diamond-tipped saws and drills create clean cuts. Core drilling allows for the installation of utilities. Proper cutting techniques prevent structural weakening.
Concrete demolition and removal involve controlled methods to avoid damage to surrounding structures. Contractors use jackhammers, saws, and hydraulic breakers. Safe handling reduces the risk of injury and property damage. Recycled concrete can be used for future projects.
Concrete stamping creates patterns that resemble natural materials. Contractors use textured mats and color hardeners during finishing. Stamped concrete adds character to patios, driveways, and walkways. Proper sealing preserves color and protects against fading.
Concrete overlays provide a cost-effective solution for resurfacing existing concrete. Contractors apply a thin layer over damaged surfaces. The new layer can be textured and colored to match design preferences. Bonding agents ensure long-lasting adhesion.
Concrete leveling corrects uneven surfaces caused by settling and shifting. Foam and slurry injections raise and stabilize slabs. Proper leveling reduces tripping hazards and improves drainage. Early correction prevents further structural issues.
Concrete sealing protects against moisture, stains, and UV damage. Contractors apply sealants to driveways, patios, and floors. Sealing enhances color and surface durability. Regular maintenance extends the lifespan of sealed concrete.
Concrete waterproofing prevents water infiltration and structural weakening. Contractors apply coatings and membranes to walls and foundations. Drainage systems reduce hydrostatic pressure. Waterproofing increases the lifespan of concrete structures.
Concrete jointing prevents cracks by allowing for controlled expansion and contraction. Contractors cut control joints at strategic intervals. Proper jointing reduces surface stress and improves appearance. Sealing joints prevents water penetration and debris buildup.
Concrete formwork shapes concrete during pouring and curing. Contractors use wood, metal, and plastic forms to create molds. Proper bracing ensures accurate dimensions and alignment. Removing forms at the right time prevents surface damage.
Concrete curing requires careful control of moisture and temperature. Rapid drying causes surface cracking and reduced strength. Contractors use water spraying, plastic sheeting, and curing compounds. Proper curing increases resistance to stress and wear.
Concrete reinforcement improves tensile strength and crack resistance. Contractors use steel bars, mesh, and fiber additives. Reinforcement is placed strategically within the concrete matrix. Proper positioning prevents weak points and structural failure.
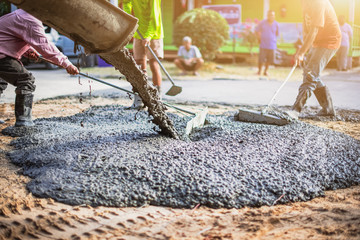
Concrete batching ensures consistent mixing and strength. Contractors measure cement, aggregate, and water in precise ratios. On-site batching allows adjustments based on weather and site conditions. Proper mixing prevents segregation and weak spots.
Concrete pumping allows efficient placement in hard-to-reach areas. Contractors use boom and line pumps for vertical and horizontal placement. Controlled pumping prevents segregation and air pockets. Proper handling ensures uniform strength and finish.
Concrete polishing creates a smooth and reflective surface. Contractors use grinders and polishing pads of increasing grit. Polished concrete resists stains and abrasions. Sealing enhances shine and protects the surface from moisture.
Concrete resurfacing restores aging concrete surfaces. Contractors clean and repair the surface before applying a new layer. Coloring and texturing options customize the finish. Proper bonding ensures long-term performance and appearance.
Concrete acid staining produces unique color variations. Contractors apply acid-based solutions to react with surface minerals. The chemical reaction creates a marbled effect. Sealing enhances color depth and protects against wear.
Concrete engraving adds custom patterns and designs. Contractors use specialized tools to carve designs into the surface. Staining enhances contrast and appearance. Engraved concrete creates a personalized look for floors and patios.
Concrete shot blasting prepares surfaces for coatings and overlays. Contractors use high-pressure machinery to remove surface contaminants. Proper preparation improves adhesion and surface texture. Shot blasting creates a clean and even finish.
Concrete sandblasting creates a textured finish for slip resistance. Contractors use abrasive materials under high pressure. Proper masking protects adjacent surfaces from damage. Sandblasted concrete enhances traction and durability.
Concrete staining enhances the appearance of plain concrete. Contractors use water-based and solvent-based stains. Proper application ensures even color and penetration. Sealing protects against fading and surface wear.
Concrete restoration involves assessing the condition of aging structures. Contractors repair cracks, spalling, and surface damage. Resurfacing and sealing restore strength and appearance. Regular maintenance extends the lifespan of restored concrete.
Concrete contractors combine technical knowledge with practical experience. Their expertise ensures proper mixing, pouring, and finishing. Attention to detail enhances strength and appearance. Professional concrete work increases the value and reliability of any project.